Tips for Soil Sampling in Dry Conditions

Soil sampling in dry conditions can be difficult. The ground is hard, fields are dry, and getting a consistent soil core depth can take more time than usual. To help you take the best soil samples this fall, we’ve put together some tips and tricks for sampling in dry soil conditions that, when implemented, will help you save time and frustration in the field.

Soil sampling equipment

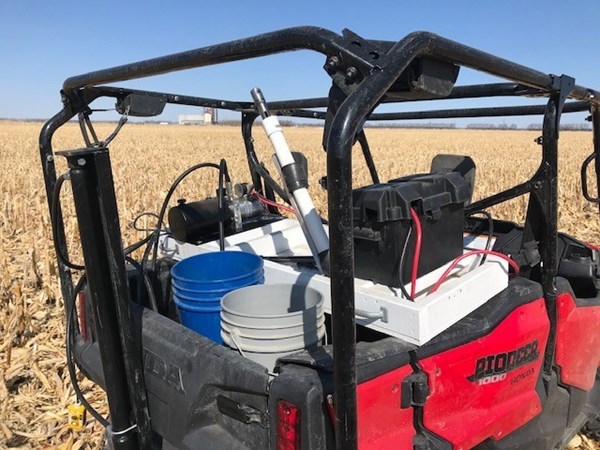
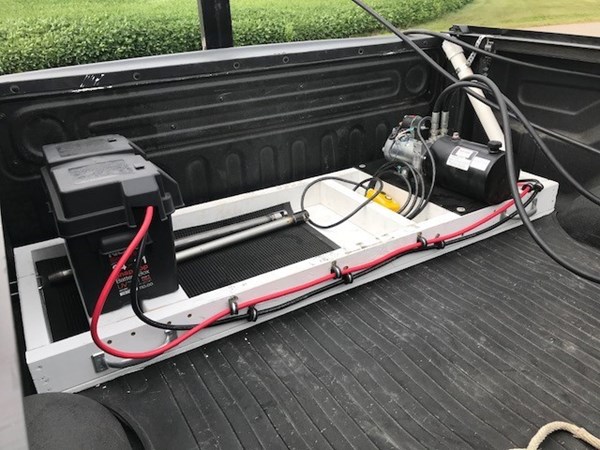
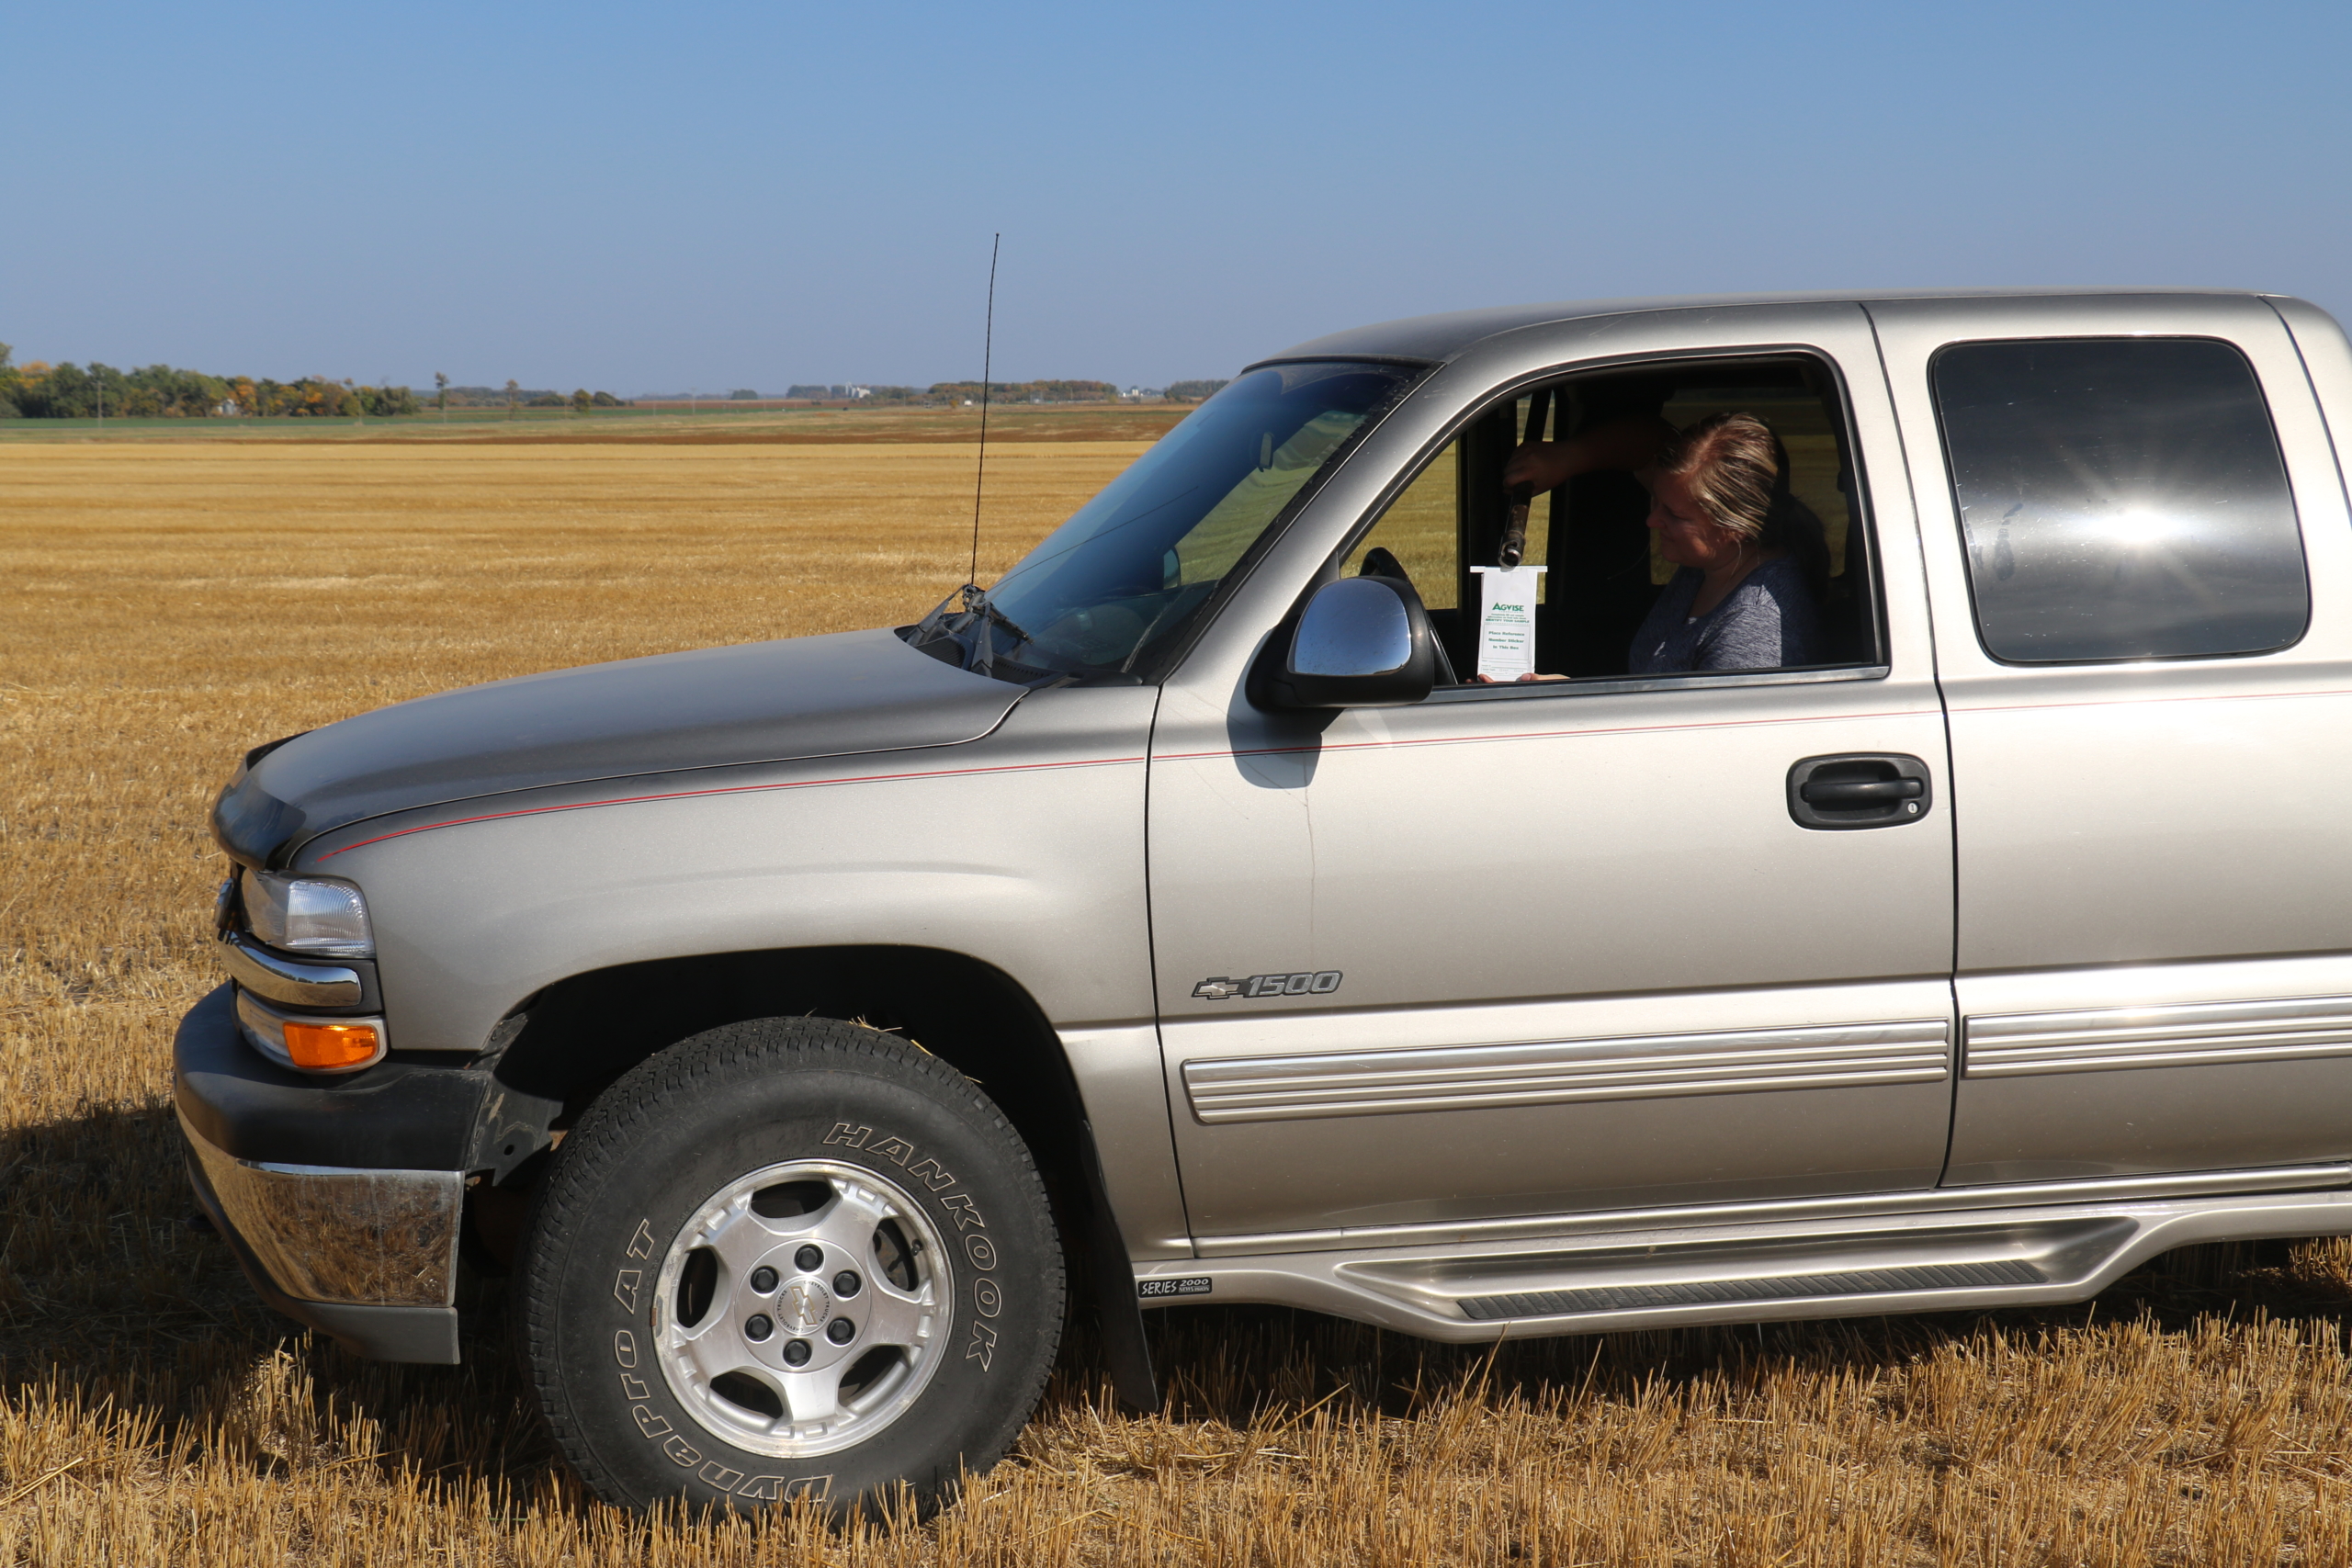
AGVISE Laboratories has provided soil sampling equipment for over 40 years. Our hydraulic soil sampling system will enable you to get high-quality soil cores, even in hard, dry soils. The electric-hydraulic power unit paired with easy-to-change Quicktach probes will make adapting to challenging soil sampling conditions simple and easy. You can find more about our equipment on our online store.

Best soil probe body

The heavy-duty (HD) probe body is made from chromoly steel. This thick-walled, hard steel probe body will resist bending under hard, dry, or frozen soil conditions (compared to softer stainless steel). The HD probe body comes in two options: solid and slotted. If the topsoil is powder dry, it is best to use the HD solid probe body, as powder-dry soil may fall out of the slot. Stainless steel probe bodies work great in most situations but in hard, dry soils the stainless-steel probe body may bend more easily than the HD probe body.

Best soil probe tip

AGVISE Laboratories carries two tips for the HD probe body. The HD “dry tip” has a sharp cutting edge and large opening (3/4-inch) that works great in hard, dry soils. It is our leading recommendation for such conditions. If you are soil sampling fine-textured clay soils, even under dry conditions, the HD “wet tip” may also work well for you because there is usually a little moisture remaining at the lower end of the 24” soil profile. It is a good idea to have both the HD dry and HD wet tips with you in the sampling rig. As soil conditions change, you can use the soil probe tip that gives you the best quality soil cores. 

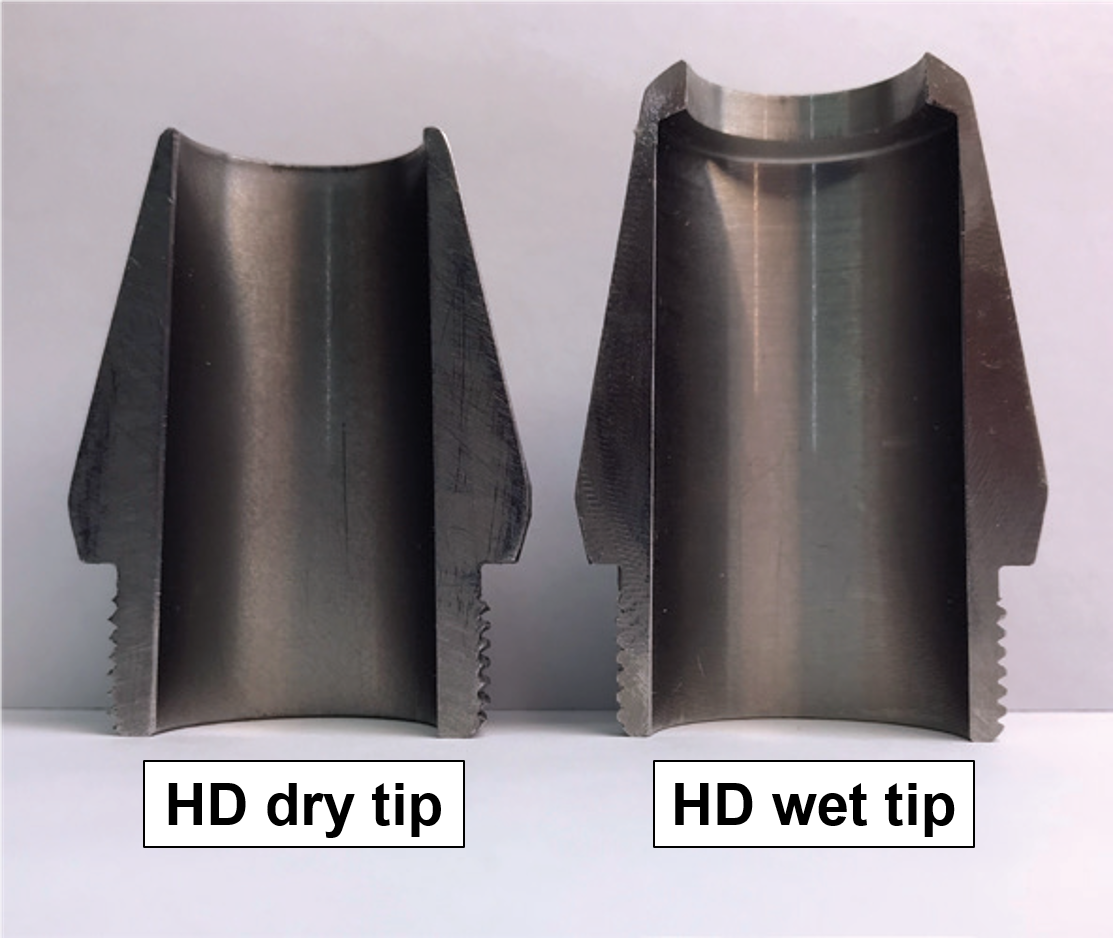
Solving common very dry soil sampling problems

What do I do if the soil probe comes up empty?

Under very dry soil conditions, sometimes the soil probe comes up empty because soil falls out the bottom of the probe. One trick to overcome this is to push the probe all the way to 24-inch (or to the end of its cycle), then lift the probe up a few inches and push it back down to 24-inch. This creates a slight plug at the bottom of the soil core that prevents soil from falling out the bottom. It seems like such a simple solution, but it works!

What if I can’t get full 24-inch soil cores and the soil probe tip has a hard plug in it, which is preventing soil from flowing into the probe body?

You are probably using a tip with an opening diameter that is too small. Dry soil does not compress well and sometimes it will not flow through a smaller tip opening. The HD dry tip has a 3/4-inch that is large enough to allow dry soil to flow into the soil probe.

Will WD-40 help me get better quality soil cores if the soil is dry and hard?

There is no benefit to using a lubricant such as WD-40 under very dry soil conditions. Dry soil is much less likely to plug the soil probe than wet soil. If you are running into a few plugged tips with the HD dry tip, try the HD wet tip. You are probably finding a layer of wet soil deeper in the soil profile. The HD wet tip has a recessed lip that will prevent plugging and will handle this layer better than the HD dry tip.

What if I can’t get a full 6-24-inch soil core? Should I change anything in the information I submit to the laboratory? 

If you are unable to get a full second soil depth (6-24-inch soil core), it is important that the information you submit to the laboratory matches the soil depth you actually collected. Mobile soil nutrients like nitrate-nitrogen are tested on the second soil depth and results are calculated based on soil core length. If the soil core is shorter than what was written on the submission form or submitted in AGVISOR, the soil test nitrate-nitrogen result will be overestimated.

Preventing fires when soil sampling

No one wants to start a fire while in the field. Unfortunately, driving anything with an engine over dry crop residue creates a fire risk. John Lee, soil sampling and testing veteran, has seen this happen firsthand. “I started a corn stalk field on fire when I was soil sampling one of my dad’s fields in college,” said Lee. “The fire was put out quickly, but I was embarrassed that I did not have anything in the truck with me to put the fire out.”

After visiting with several customers with many years’ experience soil sampling in dry conditions, we compiled a list of practices that can reduce the chance of fire while soil sampling.

Fire suppressing items to keep in your soil sampling rig

Remember that most fires start under the truck where straw or chaff accumulates on exhaust pipes, mufflers, etc. Your firefighting equipment needs to be long enough to reach these areas if a fire does start.

  1. Large ABC type fire extinguisher with hose
    • 10 lb size costs ~$70.00; large 20 lb size costs ~$130.00
  2. Water tank with 20-ft hose
    • A small water tank (~25 gallons) with a 20-ft hose will allow you to get to any location on the truck to put out a fire. One sampler suggested using a small spray tank system designed for ATVs. The systems cost roughly  $350-$450, are self-contained, and run from a battery. You may already have a small weed spraying system you can put in the box of your soil sampling truck to use as a firefighting system.

Practices to reduce fire risk before one starts

  1. Soil sample in the morning when it is cool and overnight dew is still present
  2. Talk with your clients about reducing stubble height. This should not be an issue with drought-stressed crops because the stubble height will be shorter than normal.
  3. Keep as much ground clearance under your truck as possible to prevent chaff buildup on the frame, axels, and crossmembers.
  4. Inspect your truck at the end of each day to make sure straw and chaff are not accumulating in places that could start a fire the next day. Use an air compressor to blow out all the nooks and crannies accumulating crop residue.
  5. Stay alert for any hints of smoke while soil sampling. At the first hint of smoke, find where the smoke is originating quickly and extinguish it, or get out of the field and into a safe area to figure out where the smoke is coming from.

Sidedress Nitrogen for Corn Using the Pre-Sidedress Soil Nitrate Test (PSNT)

As the corn crop begins to emerge, it is time to prepare for sidedress nitrogen applications. Sidedress nitrogen for corn can be applied any time after planting, but the target application window is generally between growth stages V4 and V8 before rapid plant nitrogen uptake occurs. Split nitrogen applications have become a standard practice in corn to reduce in-season nitrogen losses on vulnerable soils, such as sandy and clayey soils. More and more farmers now include topdress or sidedress nitrogen as part of their standard nitrogen management plan. These farmers have witnessed too many years of high in-season nitrogen losses through nitrate leaching or denitrification.

The target timing for PSNT sampling is when corn is 6 to 12 inches tall at the whorl, often near V4 or V5 growth stage (pictured above). Do not hesitate in collecting soil samples for the PSNT; the target window for sidedress nitrogen applications in corn is between the V4 and V8 growth stages.

Whether your nitrogen management plan includes a planned sidedress nitrogen application, or if this is now your first opportunity to apply nitrogen to corn this spring, the Pre-Sidedress Soil Nitrate Test (PSNT) is one tool to help make decisions about in-season nitrogen. You may also hear this called the Late-Spring Soil Nitrate Test (LSNT) in Iowa. PSNT is an in-season soil nitrate test taken during the early growing season to determine if additional nitrogen fertilizer is needed. PSNT helps assess available soil nitrate-nitrogen prior to rapid plant nitrogen uptake and the likelihood of crop yield response to additional nitrogen.

The PSNT can also help you decide the appropriate sidedress nitrogen rate. The PSNT requires a 0-12 inch depth soil sample taken when corn plants are 6 to 12 inches tall (at the whorl), usually in late May or early June. The soil sample is analyzed for nitrate-N. Late-planted corn may not reach that height before mid-June, but PSNT soil samples should still be collected during the first two weeks of June. The recommended soil sampling procedure requires 16 to 24 soil cores taken randomly through the field, staggering your soil cores across the row as you go. All soil cores should be placed in the soil sample bag and submitted to the laboratory within 24 hours or stored in the refrigerator.

You can submit PSNT soil samples using the online AGVISOR portal by choosing the “Corn Sidedress N” crop choice and submitting a 0-12 inch soil sample for nitrogen (nitrate-N) analysis. AGVISOR will generate sidedress nitrogen fertilizer guidelines, using the Iowa State University PSNT critical level of 25 ppm nitrate-N (0-12 inch depth). If PSNT is greater than 25 ppm nitrate-N, then the probability of any corn yield response to additional nitrogen is low. If spring rainfall was above normal, then the PSNT critical level of 20 to 22 ppm nitrate-N (0-12 inch depth) should be used. Iowa State University provides additional PSNT interpretation criteria for excessive rainfall, manured soils, and corn after alfalfa.

If the PSNT is taken after excessive rainfall, the soil cores can be very wet and difficult to mix in the field. Therefore, it is best to send all soil cores to the laboratory to be dried and ground, ensuring a well-homogenized soil sample for analysis. Although in-field soil nitrate analyzers have improved over the years, the difficult task of blending wet, sticky soil cores in the field still remains. The only way to get accurate, repeatable soil analysis results is to dry, grind, and homogenize the entire soil sample in the laboratory before analysis. AGVISE provides next-day turnaround on PSNT soil samples. The soil samples are analyzed and reported the next business day after arrival at the laboratory. The soil test results will be posted to the online AGVISOR portal for quick and easy access.

More resources on the Pre-Sidedress Soil Nitrate Test (PSNT)

Preparing for Spring Soil Sampling

Even when fall soil sampling weather cooperates, there is always some soil sampling to do each spring. No matter the spring conditions, the soil sampling window is tight if you are planning to collect soil samples and get the soil test results back in time for spring fertilizer decisions. You will want to pull soil samples before the field will carry a pickup truck, without leaving deep ruts, to maximize the spring soil sampling window. Your soil sampling rig choices are usually walking the field with a hand soil probe or using an ATV/UTV.

Over the years, many creative clients have outfitted UTVs with hydraulic soil sampling equipment to collect 24-inch soil cores in the spring. This has allowed soil samplers to get into a field about one week before it could carry a pickup truck. It is a big deal if you can get soil test results back one week sooner in the spring!

It is fairly simple to rig a UTV with the receiver hitch-mounted hydraulic soil sampling system kit. All you need to build is a wooden box to hold the electric-hydraulic power unit and a large starter battery. The hydraulic cylinder is mounted on a channel iron, which simply attaches to the receiver hitch. A large starter battery has enough charge to complete a good day of soil sampling without a recharge. Just make sure you put the battery on the charger overnight.

Some clients have created hydraulic soil sampling systems that can be quickly added and removed from a pickup truck box or UTV. It is a quick and easy add-on for the couple weeks of spring soil sampling that you may do. If you want some simple designs for self-contained soil sampling systems that can be removed in 10 minutes or less, these are some examples to consider.


Once the soil sample is collected, the next step in successful spring soil testing is getting them analyzed ASAP. AGVISE Laboratories knows that every spring soil sample is a rush, and our normal turnaround time is next-day (24 hours after soil sample is received). If you need any soil sampling equipment or supplies, we have everything in stock to ensure you get spring soil testing completed on time. We know spring soil testing can be stressful, but we hope to make it easier with the right soil sampling equipment and the reliable soil testing services that AGVISE has provided since 1976.

Soil Testing and 4R Nutrient Stewardship

Each year, farmers aim to increase agricultural production and profitability while conserving our land resources for the next generation. These tandem goals drive sustainable soil fertility and crop nutrition decisions on cropland across the world.

In 2005, global fertilizer industry and environmental stakeholders began developing a standard theme to emphasize science-based stewardship in soil fertility and crop nutrition. The theme eventually became known as 4R Nutrient Stewardship, where each “R” referred to the “right” way to manage nutrients for crop production. The 4Rs are summarized as managing crop nutrition with the 1) Right Source, 2) Right Rate, 3) Right Time, and 4) Right Place.

To successfully implement 4R Nutrient Stewardship, you must start with a high-quality soil sample and an informative soil test. To begin, the fertilizer need and amount is determined through soil testing, which is based on regionally calibrated soil test levels for each crop. If you do not have a soil test, how do you know what the Right Rate is? Using crop removal rates or simply guessing without soil testing often leads to overapplication of fertilizer, cutting into profit.

A conventional whole-field composite soil sample (one soil sample per field) is certainly better than no soil sample. It gets you in the ballpark, but it does not detect variation in soil nutrient levels across the field. You might underapply fertilizer on high yielding parts and overapply fertilizer on low yielding parts. To get the Right Rate applied in the Right Place, precision soil sampling, either grid or zone, is the best way to determine the appropriate fertilizer rate and where to apply it in each field. Precision soil sampling is a proven tool to reduce over- and under-fertilization across fields, thus optimizing crop yield and profitability while reducing the potential risk of soil nutrient loss to the environment.

When you start soil sampling and making soil fertility plans for next year, keep 4R Nutrient Stewardship in mind. AGVISE Laboratories is a proud 4R Partner. To learn more about the 4Rs or become a 4R Partner, visit the 4R Nutrient Stewardship website.

Soil Testing Right Behind the Combine

This submission is courtesy of Dr. David Franzen, Extension Soil Specialist, North Dakota State University, Fargo, ND. It was originally published in the AGVISE Newsletter Fall 2019.

It is more the rule than the exception that soil sampling begins in mid-September, rather than starting immediately following small grain harvest. However, many producers miss an excellent window for soil testing by waiting too long. The reason for waiting is the hope that additional nitrogen will be made available through mineralization (i.e. decomposition of crop residue and organic matter). A review of research has shown that soil nitrate levels change very little, up or down, following small grain harvest.

Soil sampling right after harvest is recommended and has numerous advantages.

  1. Producers are more likely to use the actual soil test results for deciding fall nitrogen fertilizer rates if the soil test results are in their hands soon enough to consider before fall fieldwork begins.
  2. Soil sampling before to fall tillage provides more consistent 0-6 inch soil cores, which provides the best soil sample quality for phosphorus, potassium, zinc, organic matter, and other non-mobile soil nutrients.
  3. Soil sampling right after harvest guarantees that fields will be soil sampled on time and not missed due to weather problems that could happen later in the fall.

Field Variability Screaming in Your Ear? Precision Soil Sampling is the Answer

Your land is variable. Each fall, you watch the combine yield monitor go up and down across the field. You know where crop yield will be the best in wet years and dry years. So, why do you still use a whole-field composite soil test to manage fertilizer inputs and ignore the obvious field variability affecting crop yield potential?

Precision soil sampling, using grids or zones, divides whole fields into smaller units for soil sampling and creates more accurate and useful soil test information. It tells you exactly where you need to apply more or less fertilizer within each field, unlocking untapped crop yield potential and fertilizer input savings. Grid soil sampling, which is the most detailed approach, typically breaks a field into 2.5- to 5.0-acre grid cells. The more adaptable approach is zone soil sampling, which divides the field into productivity zones that can be managed to their needs. A well-designed zone should represent the smallest practical management unit that still accurately represents the area (e.g. 20-40 acres). Zones are commonly created using data layers such as crop yield, satellite imagery, soil survey, topography, salinity, drainage, or a combination of several data layers.

Precision soil test data can reveal previously unknown production problems, which were otherwise masked in a whole-field composite soil sample. For example, more zone soil sampling has uncovered more and more low soil pH zones (below pH 6) in the long-term no-till areas of central South Dakota, southwest North Dakota, and north-central Montana. Previously, the whole-field composite soil sample had blended the low and high soil pH zones together and everything looked okay. But now, the zone soil samples are revealing where low soil pH is causing serious crop yield loss and where soil pH can be corrected with lime to improve crop yield. This is a good example of precision soil sampling revealing a long-hidden problem and showing us how to fix it.

If you break a field into smaller and smaller units (i.e. more zones), you will learn more and more about field variability. To illustrate the concept, we pulled soil test data from 23,000 zone sampled fields in 2020 and calculated the average soil test range (difference) between the high and low zones within each field. The summarized data is presented in the table.

Average soil test range within a field (high zone – low zone)
Number of zones per field Nitrate-N

lb/acre, 0-24 inch

Olsen P

ppm

K

ppm

pH Soil organic matter

%

3 27 9 88 0.57 1.10
4 38 14 108 0.76 1.52
5 45 17 137 0.89 1.73
6 55 21 164 1.12 1.68
7 61 23 184 1.25 1.59
8 65 24 183 1.26 2.04

As the number of zones increases in a field, the range in soil test values (high zone – low zone) also increases and highlights the true variability across the field. The trend is clear not just for soil nutrients like nitrogen, phosphorus, and potassium, but also for soil properties like pH and organic matter. This tells us that one whole-field “average,” was missing the highs and lows that occur naturally in many fields.

Precision soil sampling is the first step in understanding what is really happening in your fields. You can gain a clearer picture of what plant nutrient deficiencies might be occurring and where you can improve crop yield potential. The next step is creating variable-rate prescriptions for seed, fertilizer, lime, and even herbicides (consider soil pH and organic matter). These tools can help you improve crop yield, optimize crop inputs, and increase profitability within each field on your farm.